Showing posts with label holiday. Show all posts

Tuesday, December 14, 2010

Paperback Tree

I've got an easy-peasy, last minute project for you that you'll be able to put together while watching A Christmas Story or
It's a Wonderful Life. . .Really!
And you don't need many supplies either. . .Honestly!
In fact, this is really all you need to make the Paperback Tree shown at the top of this post! Well, it doesn't have to be a Nora Roberts novel~ any paperback book will do. But just make sure it's a book you're finished reading!
The first thing you're going to do is tear off the front and back covers,
leaving the binding in tact.
One the first page, take the top corner and fold it down to meet the binding.
Then fold the same folded page down to meet the binding again.
There will be a small triangle of the bottom of the page hanging below the book. Take that triangle and fold it up so that it is even with the bottom of the book. Three folds, that's it!
Now go to the next page and make those same three folds.
And repeat the folding process on every single page.
That's right, keep on folding. You may want to use a bone folder to make the creases nice and crisp, but that's up to you.
Another tip: If you find that the pages you've already folded are getting in your way, you can clip them together with a binder clip. The folding does become a little more difficult as you get towards the back of the book. If you feel that your tree seems full enough and you still have pages left to fold, you can do what I did and cut off the the remaining pages by cutting through the binding with a craft knife.
When you are finished folding all the pages, this is what you will end up with. Pretty cool, huh?
You can leave the pages natural, as shown above. Or perhaps you'd like to add some color by spritzing with a little Glimmer Mist (see previous post). And then to finish off the tree it would be nice to add some sparkle to the top of the tree, like the rhinestone pin I used to top mine off.
I decided to use some spray adhesive on my tree and then sprinkle glitter and mica flakes on it.
And now it sparkles next to my other snow covered Winter Wonderland Decorations!
And that's all there is too it! I told you it was easy-peasy, didn't I?

I hope those of you who participated in Joli Paquet's Vintage Stocking Swap have mailed your stockings out to your partners by now. I've received mine and was delighted by the gorgeous stocking and goodies I received!

On behalf of all the Joli Paquet artists, I would like to thank you for your loyal support and hope that you have enjoyed this year's tutorials and kits as much as we've enjoyed putting them together for you. Wishing you all a wonderful, safe and memory-filled holiday season!

xoxo

Tuesday, November 16, 2010

Merry & Bright Crepe Paper Christmas Tree Tutorial

Hi Everyone! Cindy here! I hope you are enjoying this round of Joli Paquet for the Holidays! Today I am going to show you how to make a Merry and Bright Crepe Paper Christmas Tree!


This is a fun project to do with the kids or let them make their own. It's also a project that consists of supplies you probably already have around the house. Keep in mind you can us any color crepe paper you want. You can use all one color or multiple colors.

Supplies Needed:
Paper or Cardboard Cone (I purchased mine at Michael's but you could also use a styrofoam cone or make your own cardboard cone out of recycled cereal boxes.)
Crepe Paper (any color)
Yarn (color to coordinate with your crepe paper)
Any kind of ribbon trim (I used white pom pom trim)
Double sided tape
Craft Glue (clear drying)
Glitter (any kind but I love mine from Little Pink Studio!)
Scissors
Old paintbrush, craft stick, or toothpick

Let's get started!

Step 1: Starting at the bottom of the cone and about an inch up apply double sided tape all the way around the cone. You just want the tape to be where the top of the crepe paper will be. This is where you will begin to make and stick the crepe pleats or ruffles.

Step 2: Start with the color of your choice and stick one end of the crepe paper onto the tape. Let the paper overhang at the bottom just a bit.

Step 3: Begin folding the crepe paper to make small pleats and stick down to the tape.

Step 4: Work your way all the way around the cone with the pleats. When you come back to where you started place a piece of double sided tape at the seam.

Step 5: Fold under the end and stick down at the seam.

Step 6: Now repeat steps 1-5 until you get all the way to the top of the cone. If you have chosen multiple colors, alternate the colors as you move up the cone. Be sure and overlap the bottom of the top row onto the row underneath to cover up the top of the pleats.

It should look something like this as you are working the next row.

As you work your way up it should look something like this.

Step 7: Making the Pom Pom top. Wrap yarn around a playing card or even your fingers. The thicker the wrap the thicker your pom pom will be.

Step 8: Slide the wrap off the card. Cut a length of yarn and tie it around the middle of the yarn wrap.

Step 9: Cut the loops on both sides.


Step 10: Fold the pom in half at the middle and give it a good trim.

Step 11: Glue the pom to the top of the tree. You can trim more if needed. Mine is kinda wild! LOL


Step 12: Add any type of trim at the top of the tree under the pom to cover up any gaps. I used mini pom trim but you can use ribbon, ric rac, etc.

Step 13: Using an old paint brush, craft stick, or tooth pick apply clear drying craft glue to the bottom of the edge of the first layer.

Step 14: Apply glitter to the glue.

Step 15: Repeat steps 13-14 until you have done all the layers of the tree. Let DRY. I also applied glitter to the pom pom top and pom pom trim.


And your cute bright festive tree is done!!!! I hope you had fun and I hope you will make an entire forest of trees! They are quick, easy, and inexpensive and they add a special touch to your Holiday decor! This is a great project to do over the Thanksgiving break. Get the entire family involved!

Be sure and post any trees you make in our Joli Paquet Flickr group (see the link the left). We would love to see your cute trees!!!

Happy Holiday Crafting,

Thursday, November 11, 2010

Mercury Glass Ornament


Supplies:
Clear glass ornament
Black spray paint
Hot glue gun
Assorted ribbons and embellishments
Self adhesive gems
Adirondack Alcohol Ink Mixatives
Adirondack Alcohol Inks (dark colors are best)


It’s only seven weeks until Christmas! Can you believe it? I really love aged and worn mercury glass. I like to scatter it throughout my home for the holidays. Unfortunately the real stuff in expensive and hard to find. So I found a way to make my own. You could use this technique for any glass surface: candle holders, frames, vases, and plates. I think it would make a great gift too.
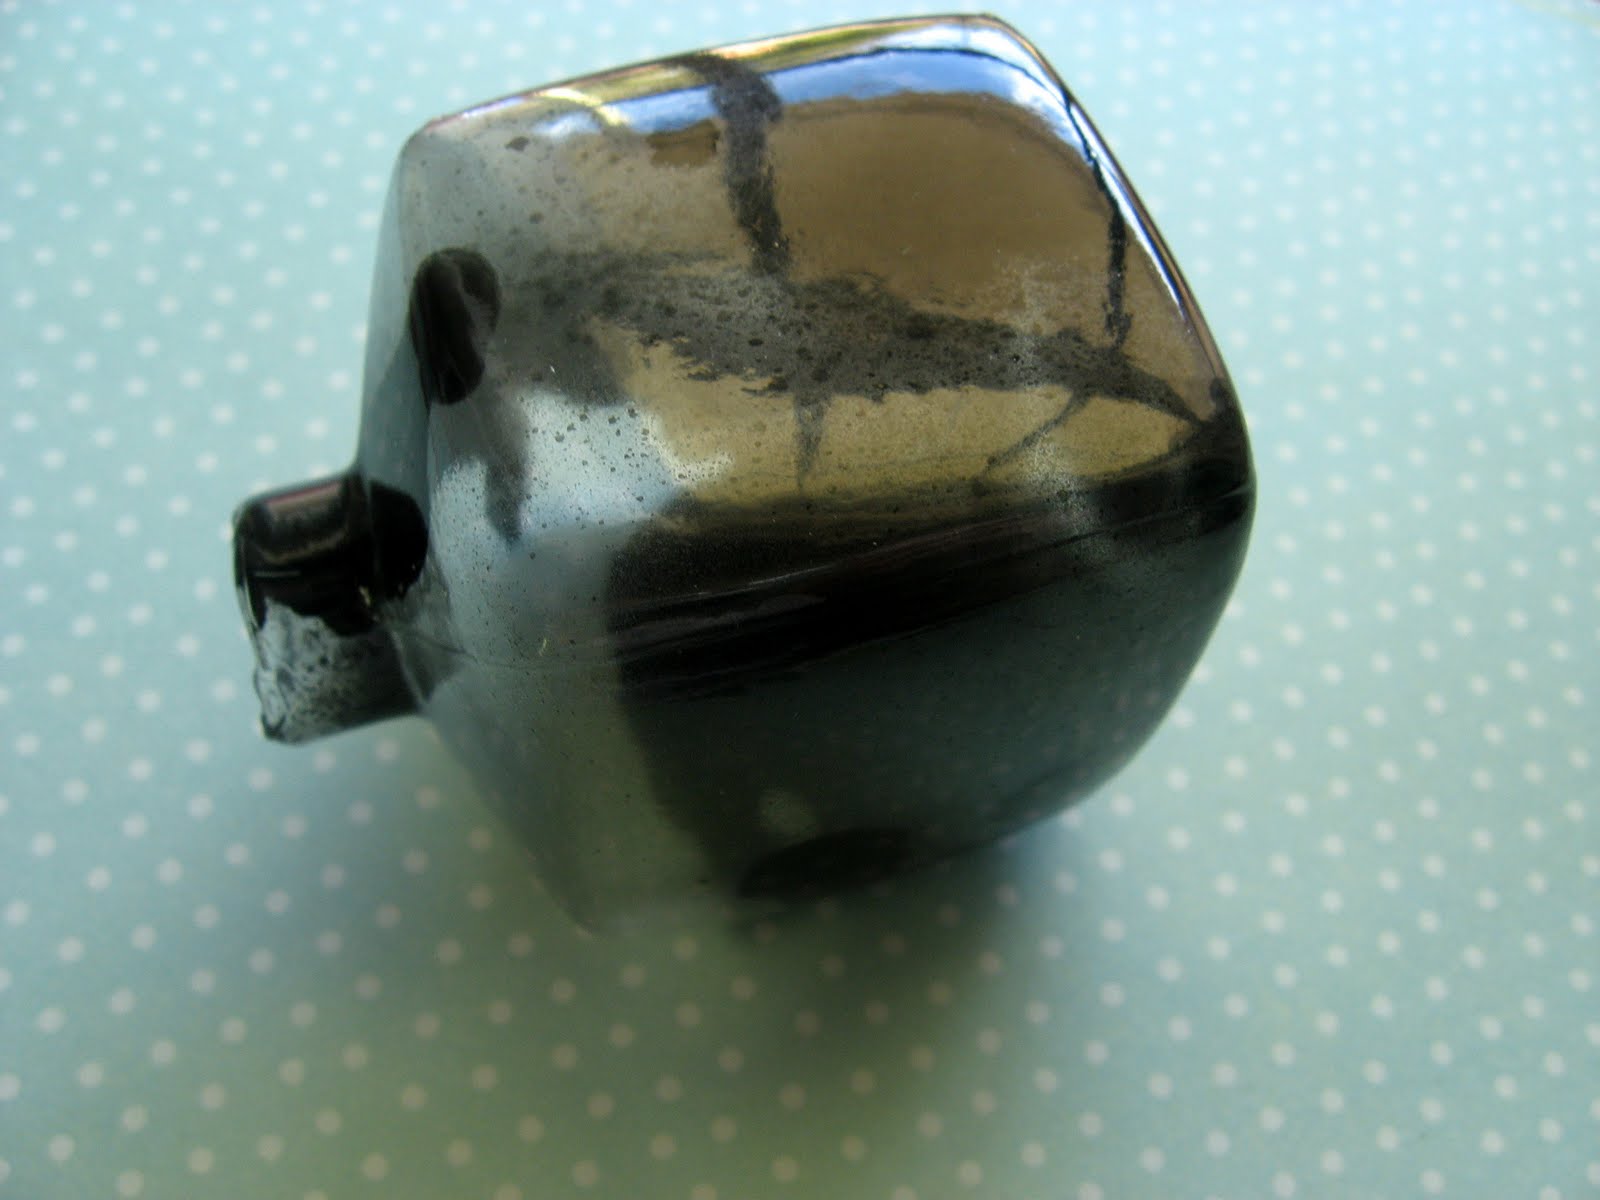
1. Take off top of ornament. Using black spray paint gently make several short sprays into ornament.(best to do outside) Twist, turn, and shake ornament to move paint around in swirl patterns before it dries. You do not have to cover the whole inside. Irregular splotches are good. Let dry. This does not take long.

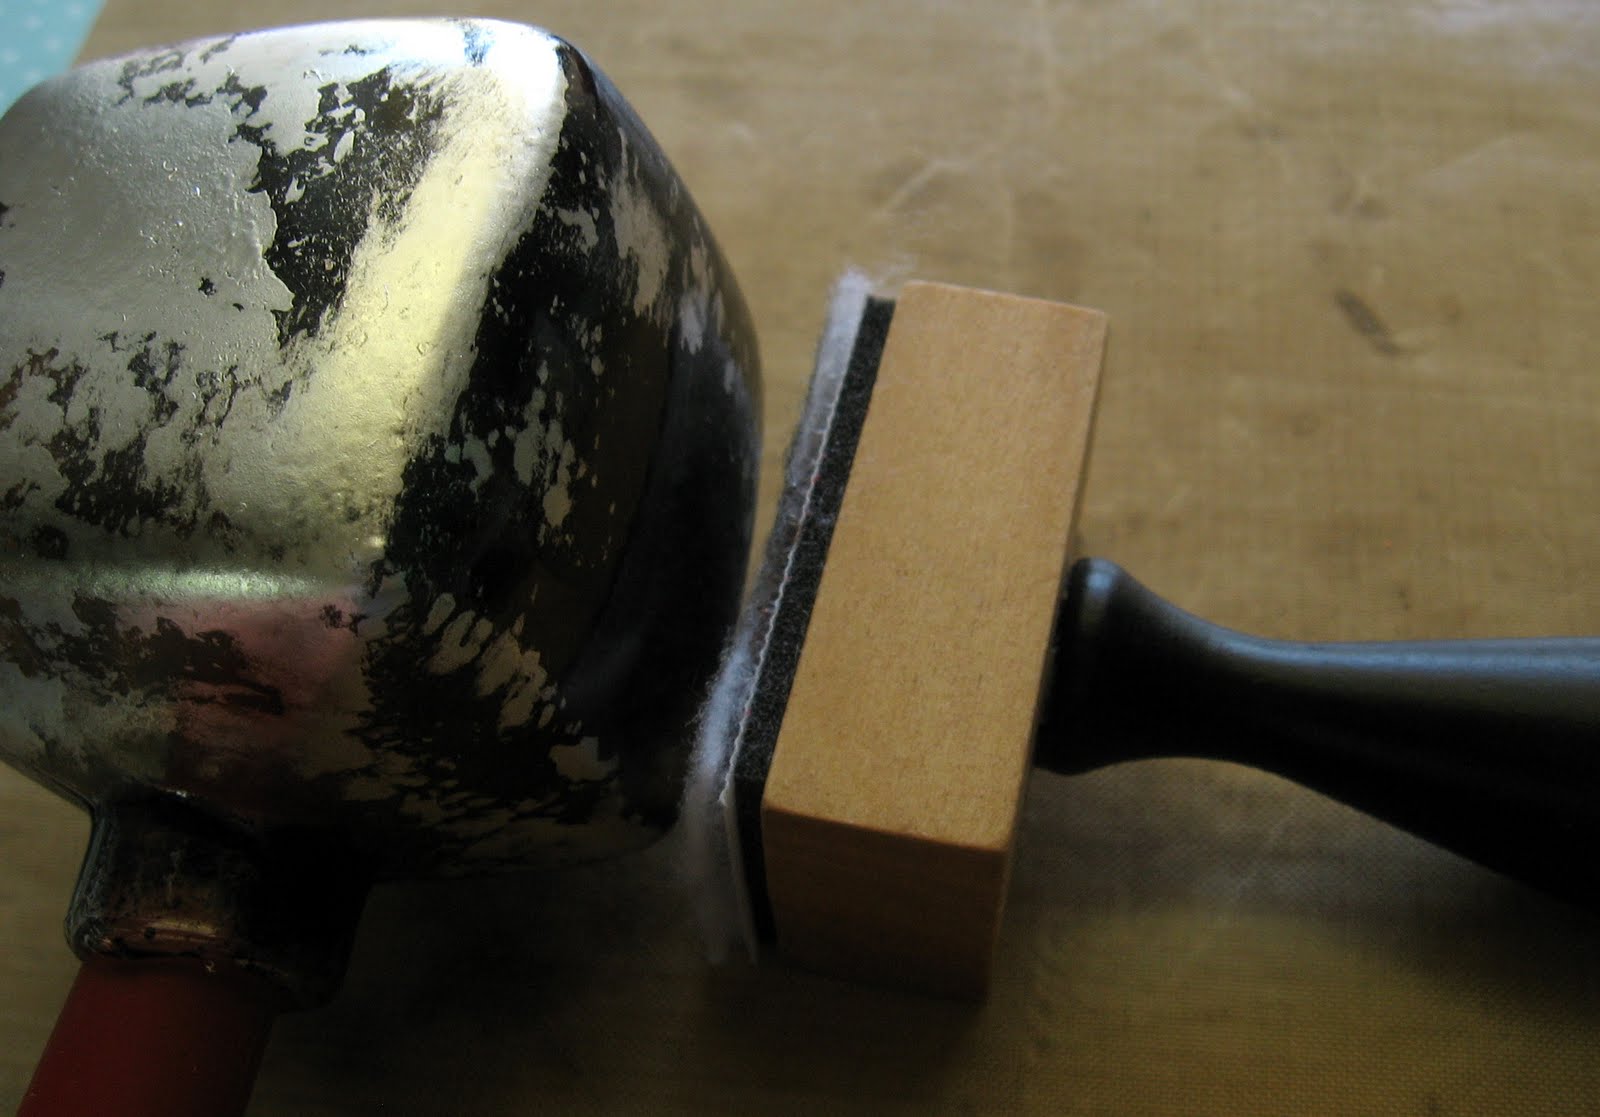
2. Stick a pencil, paint brush, or other object into ornament to have something to hold onto. Drop small dots of the Alcohol ink onto felt pad on ink applicator. Just use a random pattern using two darker colors of alcohol ink. Add a small amount of Alcohol ink blender.

3.Dab applicator onto ornament until you get the coverage you want. Let dry.

4. Use a new piece of felt and repeat step 2 with silver or gold alcohol ink mixative. Do not add as much alcohol blender. Dab onto ornament leaving spots blank for the black to show through. Make sure you dab NOT twist. Also be sure not to touch it with bare hands or it will leave a fingerprint. Let dry. Add more if necessary.

5. Add ribbon to the topper using hot glue. Apply self adhesive gem stones on each side. Tie some ribbon through the hanger. Embellish with tiny ornaments or buttons.


Don’t forget to send an email to cerri @ thelittlepinkstudio.com by Sunday the 14th if you want to be in the stocking swap! And if you try out our tutorials we would love to see what you made. You can post a picture in our Flickr Group.

Brandy

Tuesday, October 26, 2010

Quick and Easy Table Setting Accessories


Hi everyone! We hope you are enjoying all the Holiday tutorials here on Joli. Today I am going to show you how to add a quick and easy special touch to your Thanksgiving Holiday table. This quick project will make your table look like you spent hours on it. It's a project even the kids can help with.


Today I am making handmade napkin rings and glass charms. Let's get started.
You will need:
Cardstock or construction paper
Circle punch in two sizes (this can also be done by hand)
Marker or pen that will show up on the paper you choose
Vintage book page or scrapbook paper
String, yarn, or ribbon
Decorative Scissors (optional)
Scissors
Glue or double sided tape
Stapler


Cut your vintage book page or scrapbook paper in strips that are about  1" wide and 6" long. Cut as many as you need for napkin rings. This will be the part the ring part that the napkin goes through.
Also cut the same number of circles. You can use a circle punch or use a template and hand cut your circles. I used a scallop punch. You can do any size you like. I did 2" scallop circles for mine.


I used scallop scissors to trim the long sides of my book page strips. This step is optional. You could keep them straight or use another pattern decorative scissor.


Now staple the two ends of the strip together to form a ring.


Use your pen or marker to decorate your circle any way you want.


Write your message on your circle. You can also personalize each napkin ring so they also serve as place cards.


Apply glue or double sided tape to back of each circle.


Glue circles to paper rings on top of staples. You are done with your napkin rings.


Now let's make the glass charms. Punch or cut as many circles as you need. Decorate the front of the circles with markers or pen.


Punch a small hole at top of circle.


Write names or any other identifier on each circle.


Attach a length of string or ribbon to each circle. This will be used to tie to the stem of the glass.


And you are done! A quick and easy personalized touch to your holiday table setting!

Happy Holidays and Happy Crafting!