Showing posts with label diy. Show all posts

Thursday, November 11, 2010

Mercury Glass Ornament


Supplies:
Clear glass ornament
Black spray paint
Hot glue gun
Assorted ribbons and embellishments
Self adhesive gems
Adirondack Alcohol Ink Mixatives
Adirondack Alcohol Inks (dark colors are best)


It’s only seven weeks until Christmas! Can you believe it? I really love aged and worn mercury glass. I like to scatter it throughout my home for the holidays. Unfortunately the real stuff in expensive and hard to find. So I found a way to make my own. You could use this technique for any glass surface: candle holders, frames, vases, and plates. I think it would make a great gift too.
1. Take off top of ornament. Using black spray paint gently make several short sprays into ornament.(best to do outside) Twist, turn, and shake ornament to move paint around in swirl patterns before it dries. You do not have to cover the whole inside. Irregular splotches are good. Let dry. This does not take long.

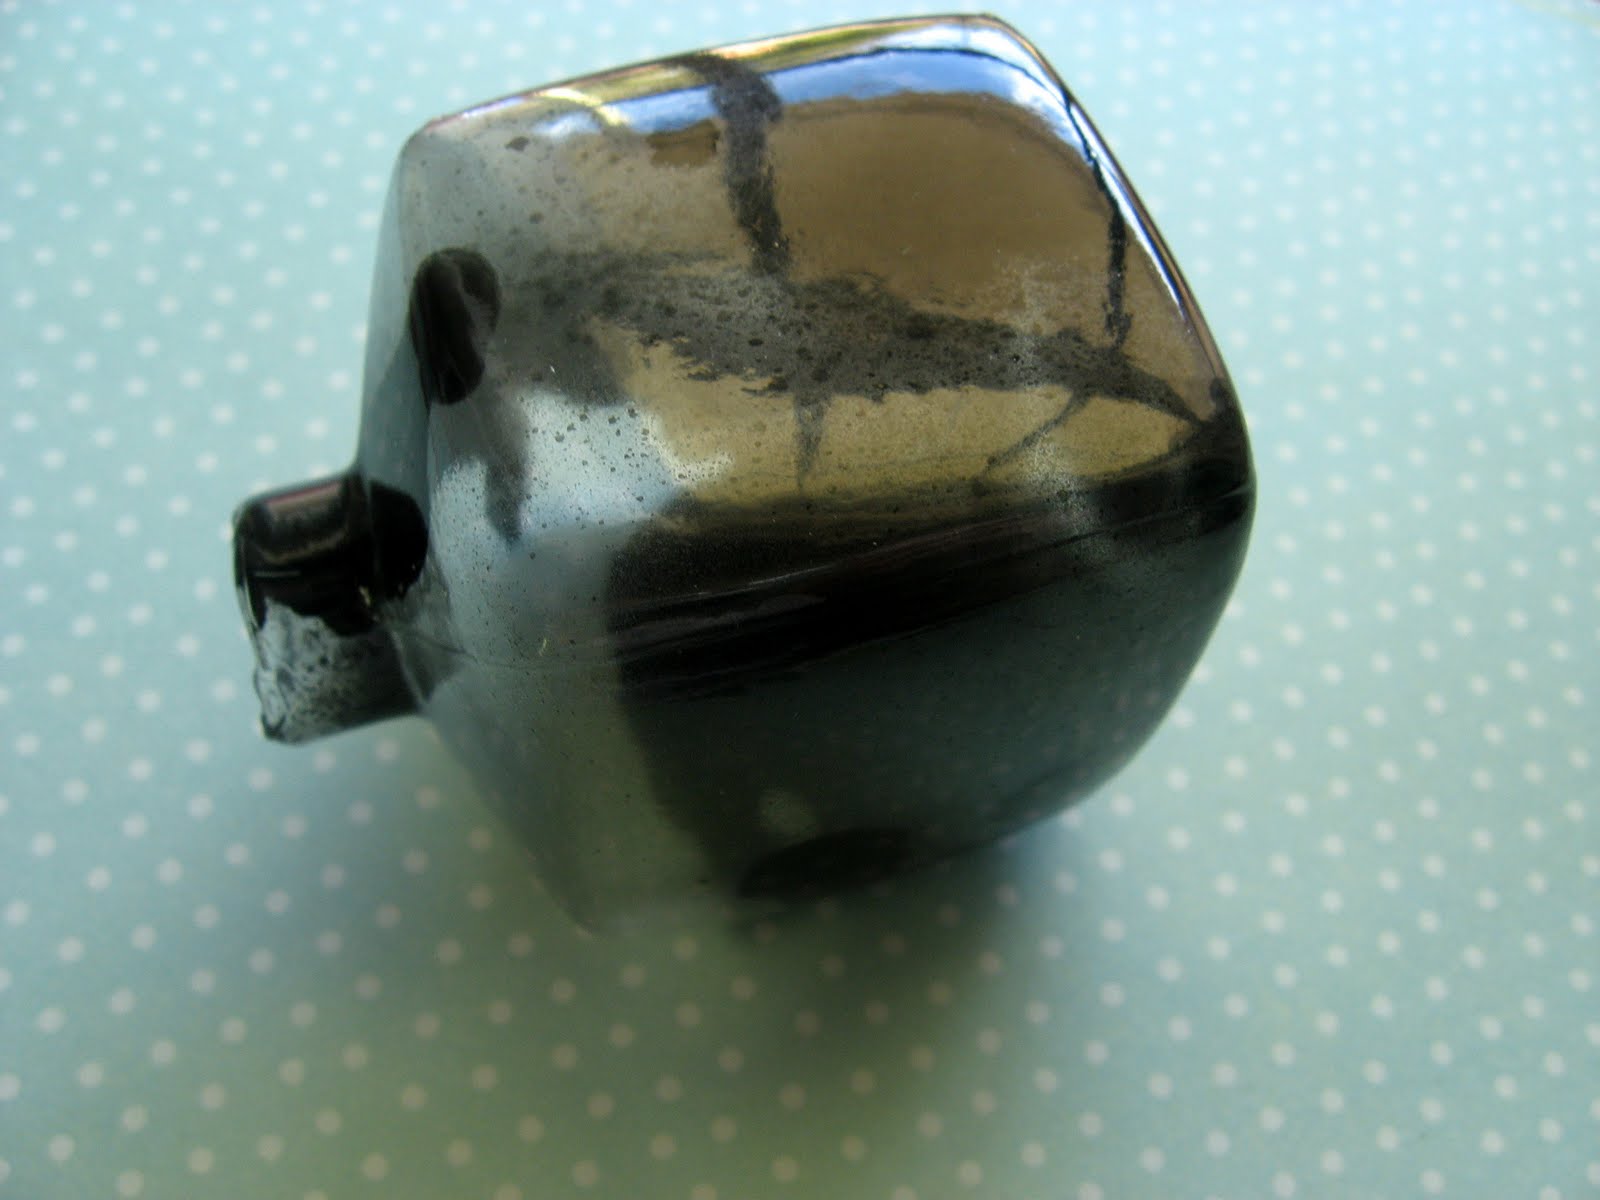
2. Stick a pencil, paint brush, or other object into ornament to have something to hold onto. Drop small dots of the Alcohol ink onto felt pad on ink applicator. Just use a random pattern using two darker colors of alcohol ink. Add a small amount of Alcohol ink blender.

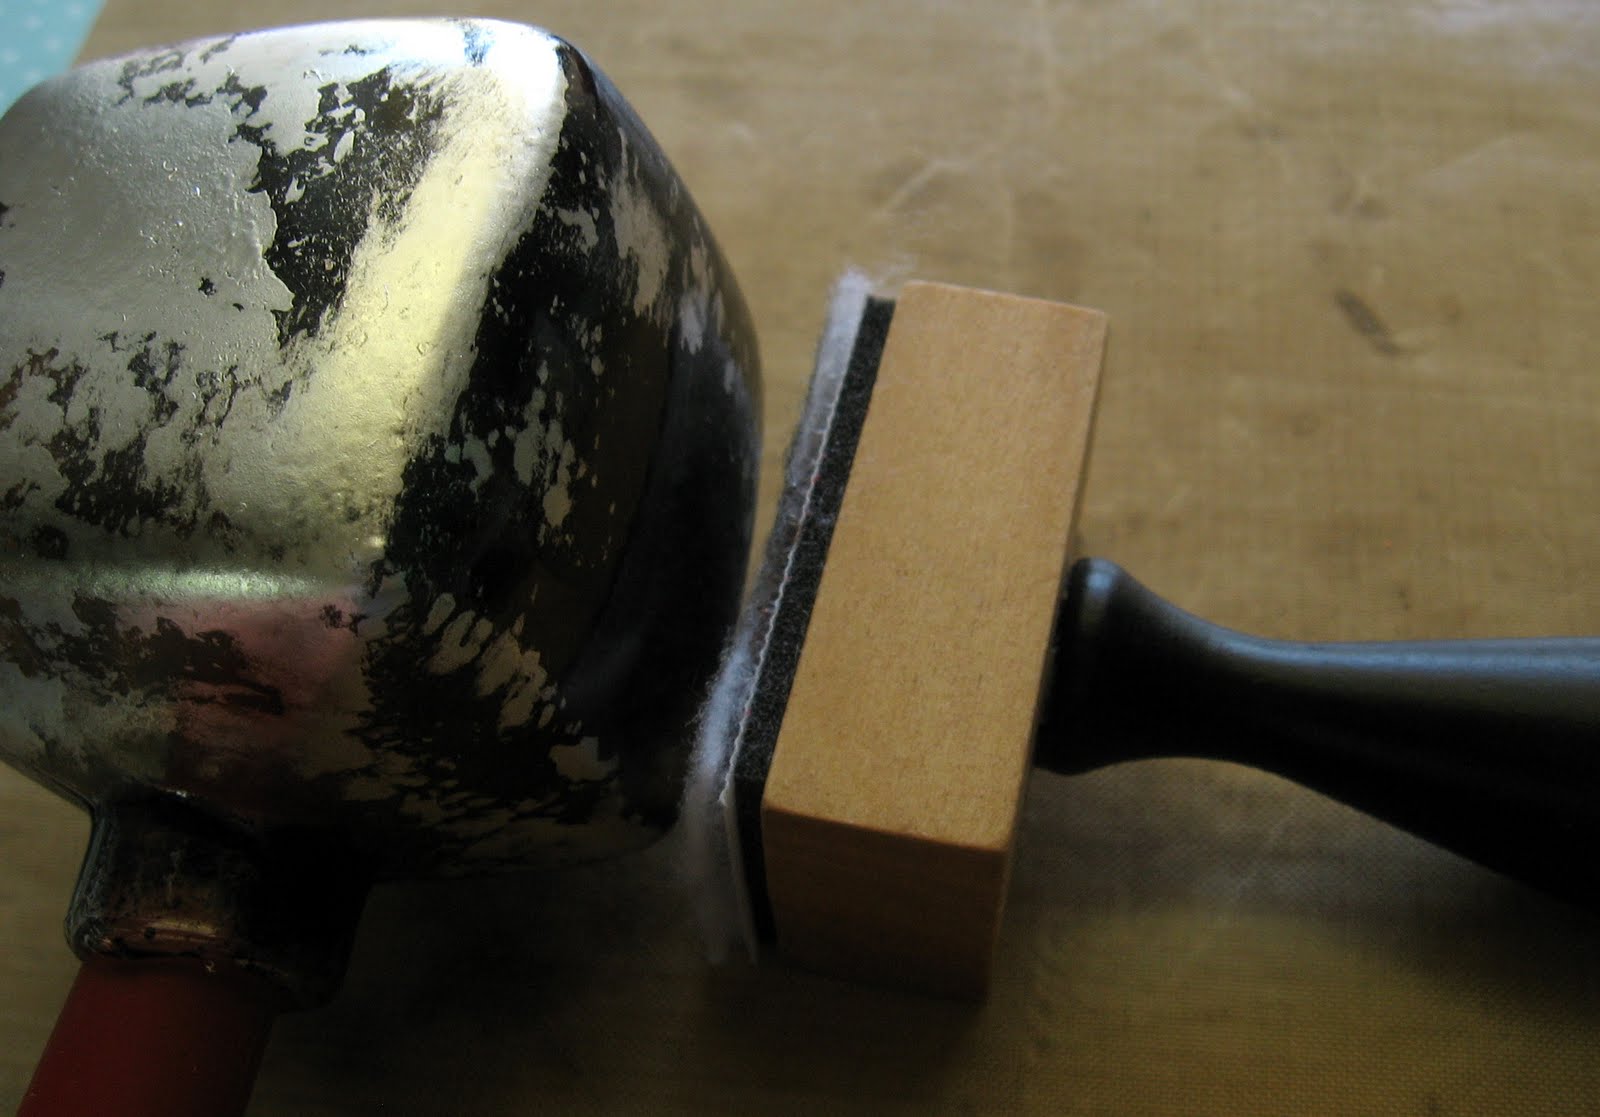
3.Dab applicator onto ornament until you get the coverage you want. Let dry.

4. Use a new piece of felt and repeat step 2 with silver or gold alcohol ink mixative. Do not add as much alcohol blender. Dab onto ornament leaving spots blank for the black to show through. Make sure you dab NOT twist. Also be sure not to touch it with bare hands or it will leave a fingerprint. Let dry. Add more if necessary.

5. Add ribbon to the topper using hot glue. Apply self adhesive gem stones on each side. Tie some ribbon through the hanger. Embellish with tiny ornaments or buttons.


Don’t forget to send an email to cerri @ thelittlepinkstudio.com by Sunday the 14th if you want to be in the stocking swap! And if you try out our tutorials we would love to see what you made. You can post a picture in our Flickr Group.

Brandy

Monday, October 4, 2010

A Little Halloween Curiosity


Its that time of year again! There is a chill in the air, pumpkins are placed on the porch, and Joli Paquet is back! I hope you all had a fantastic summer! We sure did, but I am so ready for Fall. It was a REALLY hot summer in Texas. Well, it hasn’t cooled off much yet but, this tutorial is sure to chill your bones! This project may look a little scary and daunting but its easier to make than you think.


Supplies

Arondack alcohol ink (assorted dark colors)
Scrapbook paper ( I used Pink paislee Eclipse)
Design-Ables Self-stick clear Matte paper
Distress ink and blending tool
Bone folder
Drill
Wire
Foil Tape
Halloween Stamps
Stazon ink
Plexiglas- you can buy this at Lowes in a Varity of sizes, they will even cut it for you, or find it here.


1. Plexiglas will come with protected cover. Leave this on for now. Mark glass with permanent marker for where you want hanging holes. Place glass over wood or something similar that is ok to drill into. Using firm-Not hard- pressure slowly begin to drill hole. Repeat.

2. Lay glass over paper in desired spot and trace around. Cut.


3.Ink edges of paper.


4. Peel off protective cover on glass. Cut four strips of foil tape to fit edges of glass. Using bone folder and ruler crease each tape to width you want to show on front.


5. Lay glass on top of paper. Apply tape to edge, then wrap around to back and apply on top of paper. Burnish tape with bone folder. Finish covering back with foil tape if desired.
6. Take several different shades of dark alcohol ink and apply to felt pad and blending tool. Dap foil until you have a mottled, aged look. Let dry.

7. Use Stazon Ink and Halloween stamps. Stamp directly onto front of glass. Let dry.


8. Print desired image onto Design-ables self-stick paper.

9. Peel backing off one corner and apply to glass. Using bone folder or another edge slowly peel and burnish image onto glass.

10.Poke holes into paper .Add wire or ribbon to holes. Gems, buttons, and other embellishments could also be added to sign using Inkssential Glossy accents.

How spooky would this look hanging in a window or in front of a mirror! I hope you give this tutorial a try! Its lots of fun. Help us spread the spookyness and grab our blog button for your blog. ~Brandy


Wednesday, August 18, 2010

Back To School Teacher Gift


I hope everyone had a wonderful summer! It seems summer will never end here in Texas. We are in the middle of a heat wave. Temps have been over 100 degrees for days! It’s a perfect excuse to stay in and craft. Meet the teacher day is this Thursday for my almost eleven year old son Keegan. For some reason my sweet little boy has grown a big fat attitude this summer. Is it because he is almost a teenager? Who knows. I thought just in case this “attitude” doesn’t go away I better butter up his new teacher. I created this notepad holder. It would be the perfect teacher gift, hostess gift, or a little something special for anyone you want to thank. It takes very little supplies and time. You could even make a bunch and save for all those last minute gifts you always end up needing.


Supplies


3 Sheets of Coordinating Patterned 12 x 12 scrapbook paper ( I used My Mind’s Eye- Out and About)
Bone Folder
Glossy Accents (by Ranger)
Small 8 x 5 inch Note Pad (I bought mine in bulk from Sam’s Club)
Assorted Matching Ribbon
Brad and Flower Accent
Sewing Machine (Not necessary but nice)
Ruler or Scoring Tool (I use Martha Stewarts Scoring tool)

1 Pick out one of the papers to be the outside of the holder, one for the inside, and one for the pocket.
2 Fold the outside paper in half. The pretty side will be on the outside. Use a bone folder to make the fold crisp.
3 Fold the inside paper in half with the pretty side in. Use the bone folder again.
Trim both down to 10 x 12 inches.

4 Cut the 3rd paper for the pocket down to 12 x 4 inches. Fold in half with pretty side of paper on inside.
5 Using a glue stick, Glue Glider Pro or other adhesive to glue the inside and outside paper together.


6 Glue three outside edges of pocket to inside of holder.

7 I sewed the outside edge and center of pocket. You do not have to do this but it makes it so much nicer and more durable!
8 Take left over paper from the outside and cut down to 5 x 2 inches.
Score the paper longways at ¾ inch and 1 inch.


9 Fold and glue to top of note pad


10 Add buttons, rhinestones, bows, stickers, or any flat embellishment to the top. I used Glossy accents to apply my buttons. It will make any thing stick!

Glue (I used hot glue) ribbon around the outside. Use a ruler when applying to keep it straight. Go all the way around leaving extra for tying.
11 Poke a hole near the front though the ribbon and paper. Insert brad.
12 I cut a little scrap of paper matching the inside and glued on top of the brad’s metal prongs.
13 Place your note book in the pocket and pencils or markers in the other.

Now you have a butter up the teacher...oops I mean new teacher gift.


Please feel free to pass this tutorial on! We appreciate it!
Brandy