
Hi - It's
Jeanne here and welcome to the all new
Holiday 2009 version of
Joli Paquet! I'm so excited to be the first to share with you my tutorial for the festive
Holiday Gift Card/Treat Box box shown above.
This project includes a template for making both a large and small size of the box. The larger one will hold a gift card or bracelet. The smaller box will hold a pair of earrings or candies. It's a tradition in our family to have a little treat by each place setting for Christmas dinner. The smaller box is the perfect size for this and it can do double-duty as a placecard as well.
~ Supply List ~
One - 8.5" x 11" sheet of cardstock - any color
One - 6" x 8" sheet of decorative paper - scrapbook paper, wallpaper, gift wrap
One - 1" x 6" strip of coordinating decorative paper
One 3" x 3" sheet of another coordinating decorative paper
12" strip of crepe paper in a complimentary color
2" diameter scallop edged circle punch
Large snowflake punch
Silver glitter
Medium sized Button
Thread
Embroidery Floss & Baker's Twine (optional)
Small tag
Heavy Duty Double-sided Tape
Glue Stick & White Craft Glue
Scissors
Pinking Shears (optional)
Embossing Stylus or Bone Folder
OK, now let's get started!
 Step 1
 - Double click on the template above to enlarge and then print out on plain paper.
 Step 2
 - Cut out the template for the size box you wish to make. (
I am going to show you how to make the large size in this tutorial.) Using a pencil, trace the template onto plain cardstock.
 Step 3
 - Following the lines you traced, cut out the box from the cardstock. Using an embossing stylus (
or bone folder), trace over all the dotted lines. Press down fairly hard to make folding and constructing the box easier.
 Step 4
 - Cover the entire back of the box with a glue stick and adhere in to the back of the 6"x8" piece of decorative paper. Cut off excess paper. (
Gluing first and cutting second assures that you will have a perfect fit.)
Step 5 - Apply heavy duty double-sided tape to the
right side of the
entire tab. (
I think this tape was originally called Wonder Tape. It is available at Michael's and various scrapbook stores.) Fold box on creases made with stylus. Peel off tape backing. Fold tab over and adhere to the
inside of the other end of the box (
see last picture in the photo above).
 Step 6
 - Fold end flaps on creases made with stylus. Attach the 1"x6" strip of decorative paper, as shown, and trim ends to fit box. (Both of these papers are from
My Mind's Eye)
 Step 7
 - Punch a large snowflake from white cardstock. (
I used Martha Stewart's Himalayan Snowflake punch available at Michael's.) Punch a 2" circle from coordinating paper. (
I used a scallop edged circle punch.)
 Step 8
 - Glue the snowflake to the center of the scallop edged circle. Apply white craft glue to snowflake and sprinkle with silver glitter. (
I used German glass glitter, but any glitter will do. You can even use Stickles Glitter Glue if you'd like.)
 Step 9
 - Gather one edge of approximately 12" of crepe paper (
use the full width of crepe paper) by stitching a basting stitch with thread. As you pull the thread the crepe paper strip will form a rosette. Tack down center with thread to hold in place. Glue snowflake circle on top of crepe paper rosette.
 Step 10
 - Thread embroidery floss through button holes and secure with a knot on top of the button. Glue button to center of snowflake.
 Step 11
 - Decorate a small tag with your choice of paper. I added a vintage red label to write the recipient's name. Tie a bow through the hole with a length of baker's twine and attach to the front of the box with a little craft glue.

Now you're ready to fill your pillow box with a small gift, sweet treats, or a gift card. You can decorate these little boxes as simply or extravagantly as you desire. Either way, the recipient is sure to be delighted by their little gift! As the saying goes. . . . .
Good things come is small packages!Happy Holidays!!!
xxoo


 Hi everyone! I hope you all had a fantastic Thanksgiving. Well its Black Friday and if your anything like me you would rather be crafting in your pjs than fighting a stampede of shoppers. Need a project? How about a glittery Christmas card for someone special. This card highlights some new techniques I have learned and some fabulous products you just cant live without!
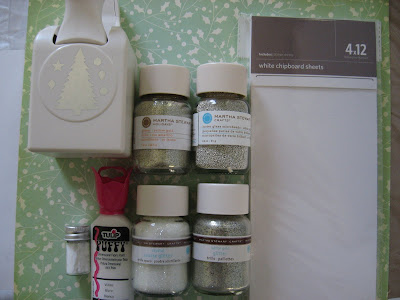 Materials
 2. For the hills of snow I drew a wavy line and just hand cut it. I also sewed random wavy lines.
 4. Now for the trees. I used Quickutz chipboard that has a peel and stick side. It is AWSOME! I punched them out using Martha Stewarts Tree punch. Simply peel the back off and add glitter, flock, or beads. You can find the tutorial for that here. I used a foam dot on the back and adhered to the card.


.jpg)


